I’m sure this isn’t a secret by now, but I love appliqué skirts! I’ve collected them for a few years now, though there are always those elusive pieces of vintage out that may forever be on my wishlist but never come around for sale again. So instead of pining for them, I also took up making my own – conveniently not too long before the first lockdown happened, when it was a good time to have a hobby. Since then I’ve churned out quite a few and surprised myself with what I can achieve (so if you’re reading this and think, I’d like to give my own appliqué skirt a go, then I can promise you: you can do it too). Another thing I love is a theme, and so my great loves combined when I came across a vintage pattern for an appliqué skirt with both a heart pocket and the words “I Love You” emblazoned on the front. It was too perfect for Valentine’s Day! My dear friend and fellow appliqué queen Kara of The Dressed Aesthetic was also planning to make the skirt, and when she suggested a joint sewing project I immediately jumped at the chance. As a quick aside, if you’re not following Kara on Instagram or reading her blog already then I recommend remedying that immediately! Her imagination is filled with the most incredible designs that she brings to life, and I am constantly amazed by her brilliance. Keep reading as I take you through the project step by step, and check out Kara’s own blog post detailing her skirt here!
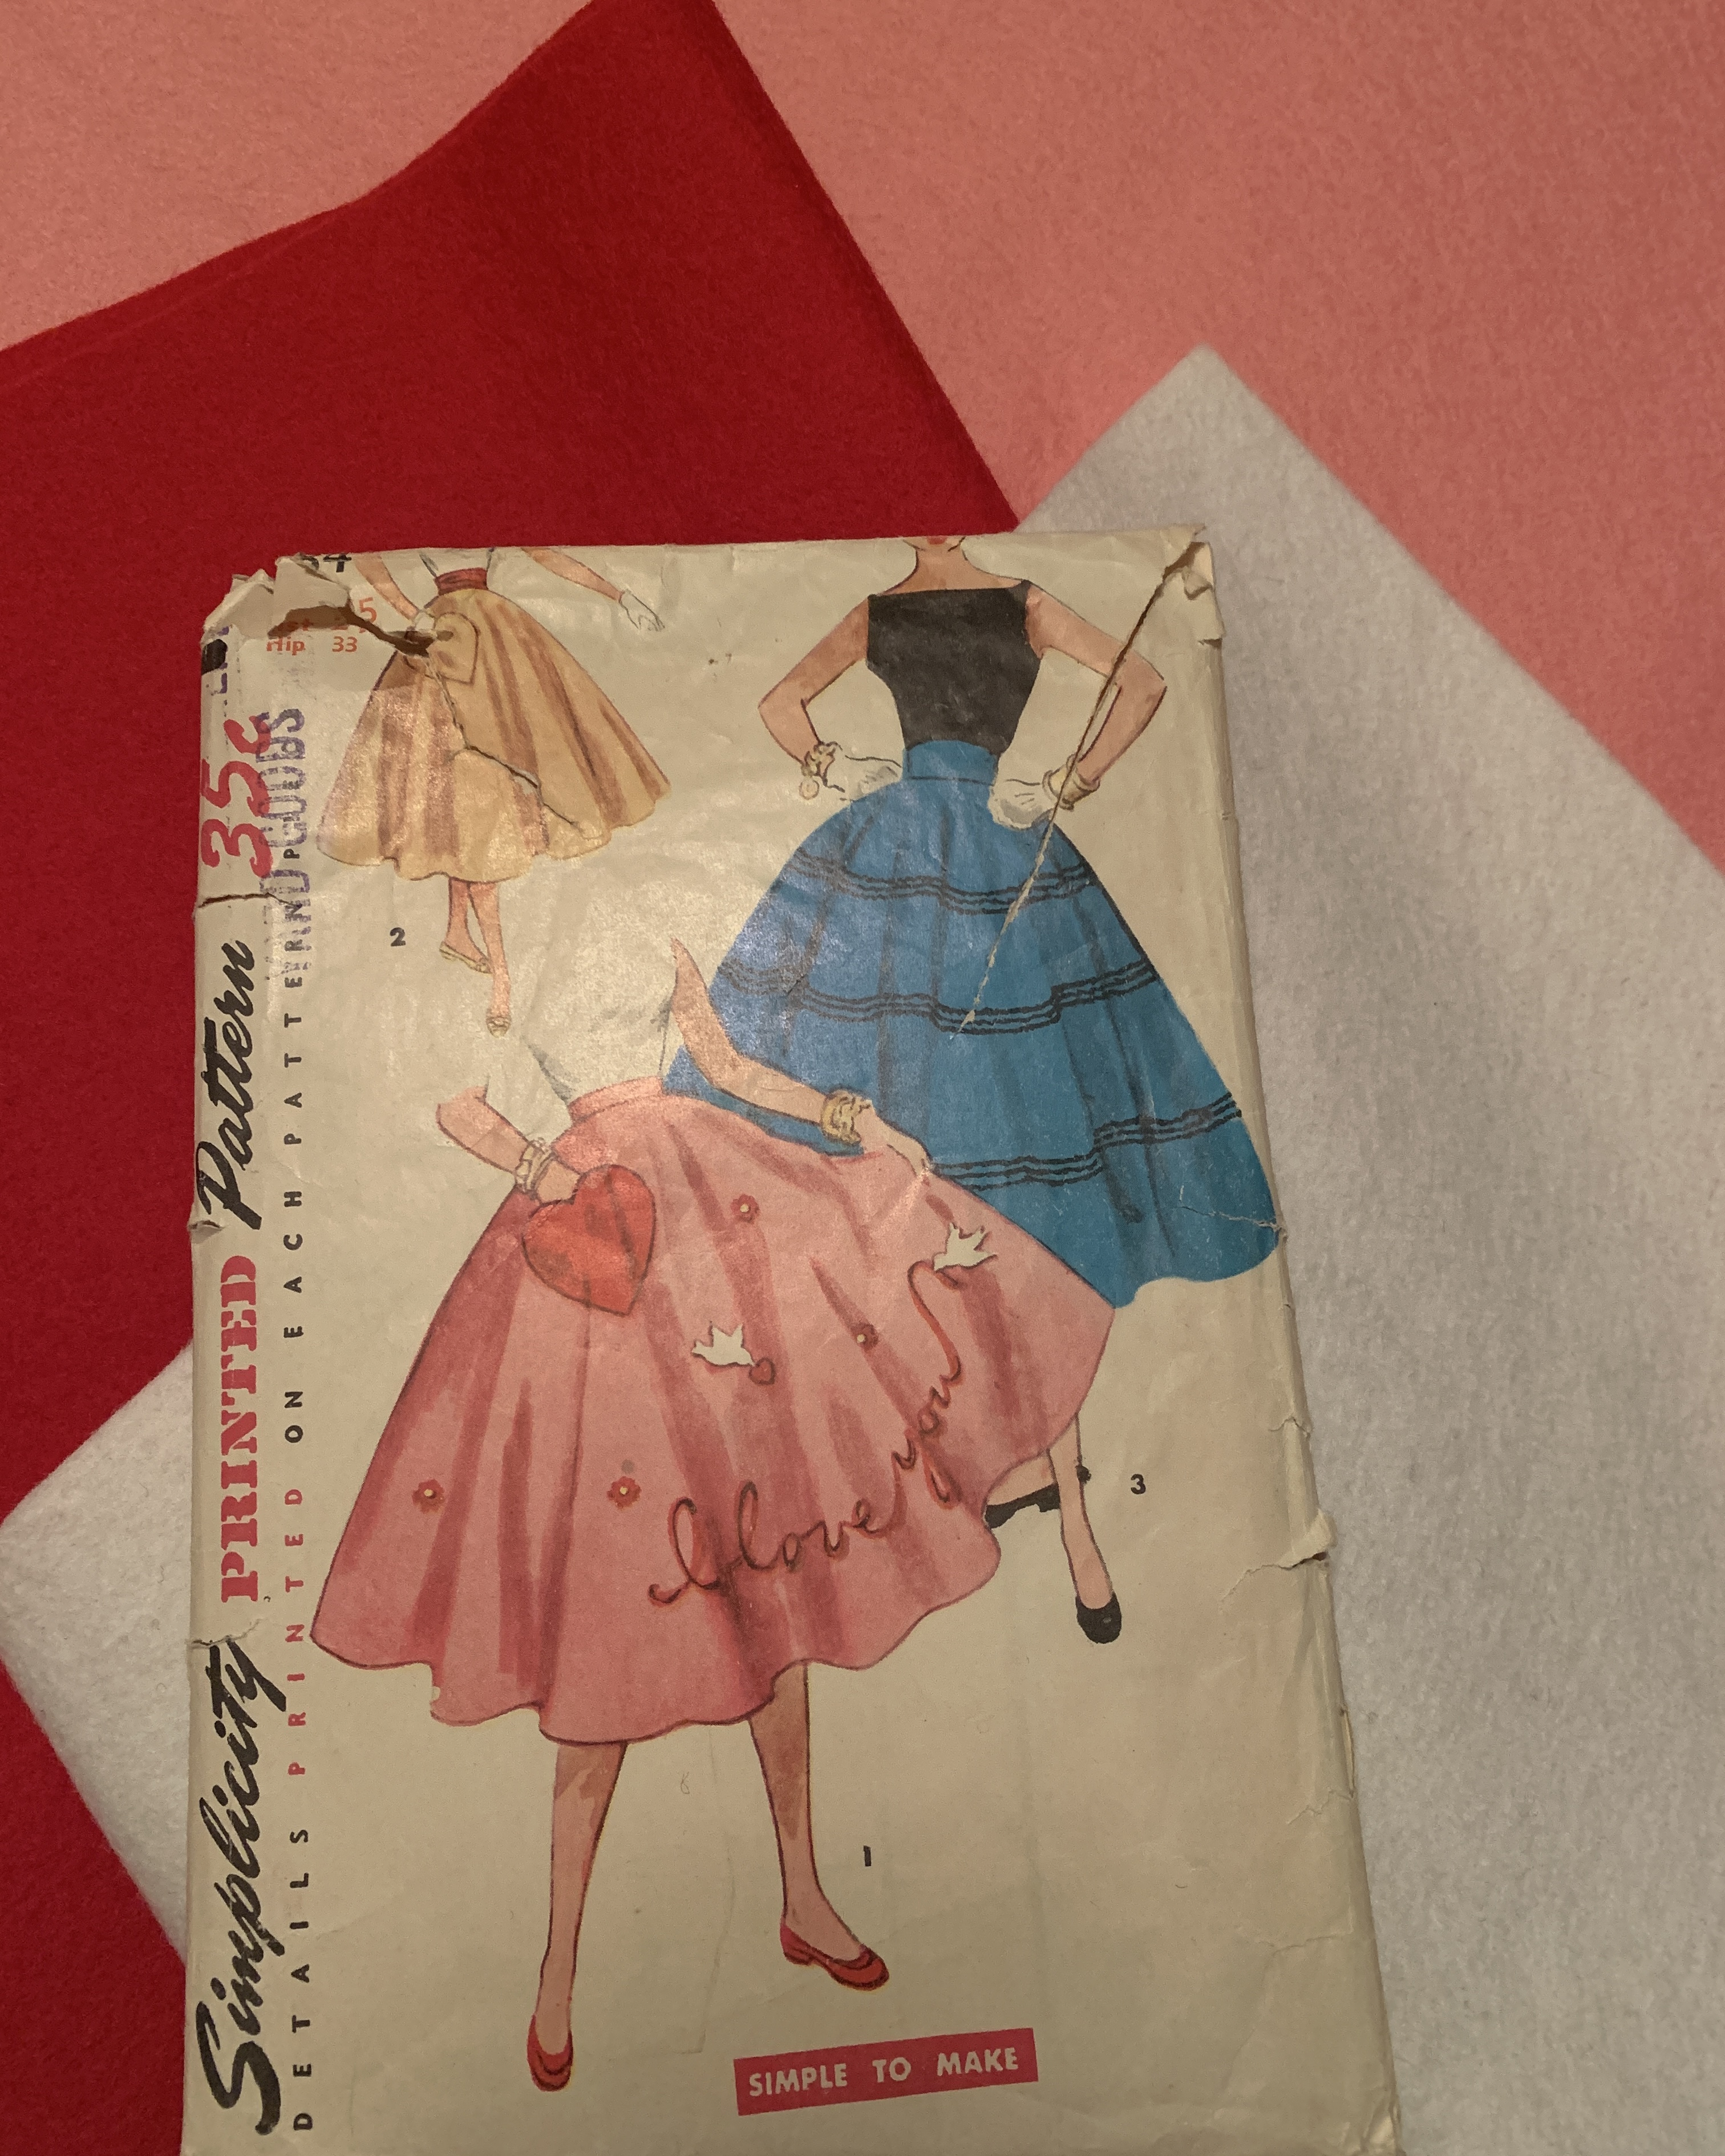
I’d spotted this pattern somewhere on the internet (probably on Pinterest – I’m forever finding things I need to make on Pinterest) a couple of years ago now, but it was strangely elusive. I desperately wanted to make the skirt as soon as I laid eyes on it (cos, I mean, so cute), and wondered if I could wing it, but being a perfectionist I figured if I could get my hands on the pattern that would be ideal. Cue setting up an eBay alert for the pattern number (Simplicity 4784) and constantly refreshing a search for it on Etsy. Eventually, there it was! The packaging was a bit worse for wear but the pattern pieces were all in tact. I waited (impatiently) for it to arrive from the US, even though this was last April and I knew I wouldn’t actually make it until closer to Valentine’s Day. Amazingly, just after I got mine another one came up for sale almost immediately, so I notified Kara who nabbed it lightning fast. It was the perfect joint sewing project, where we both had the same tools (or in this case, pattern) to work with, but it gave us a chance to still put our own stamp on it.


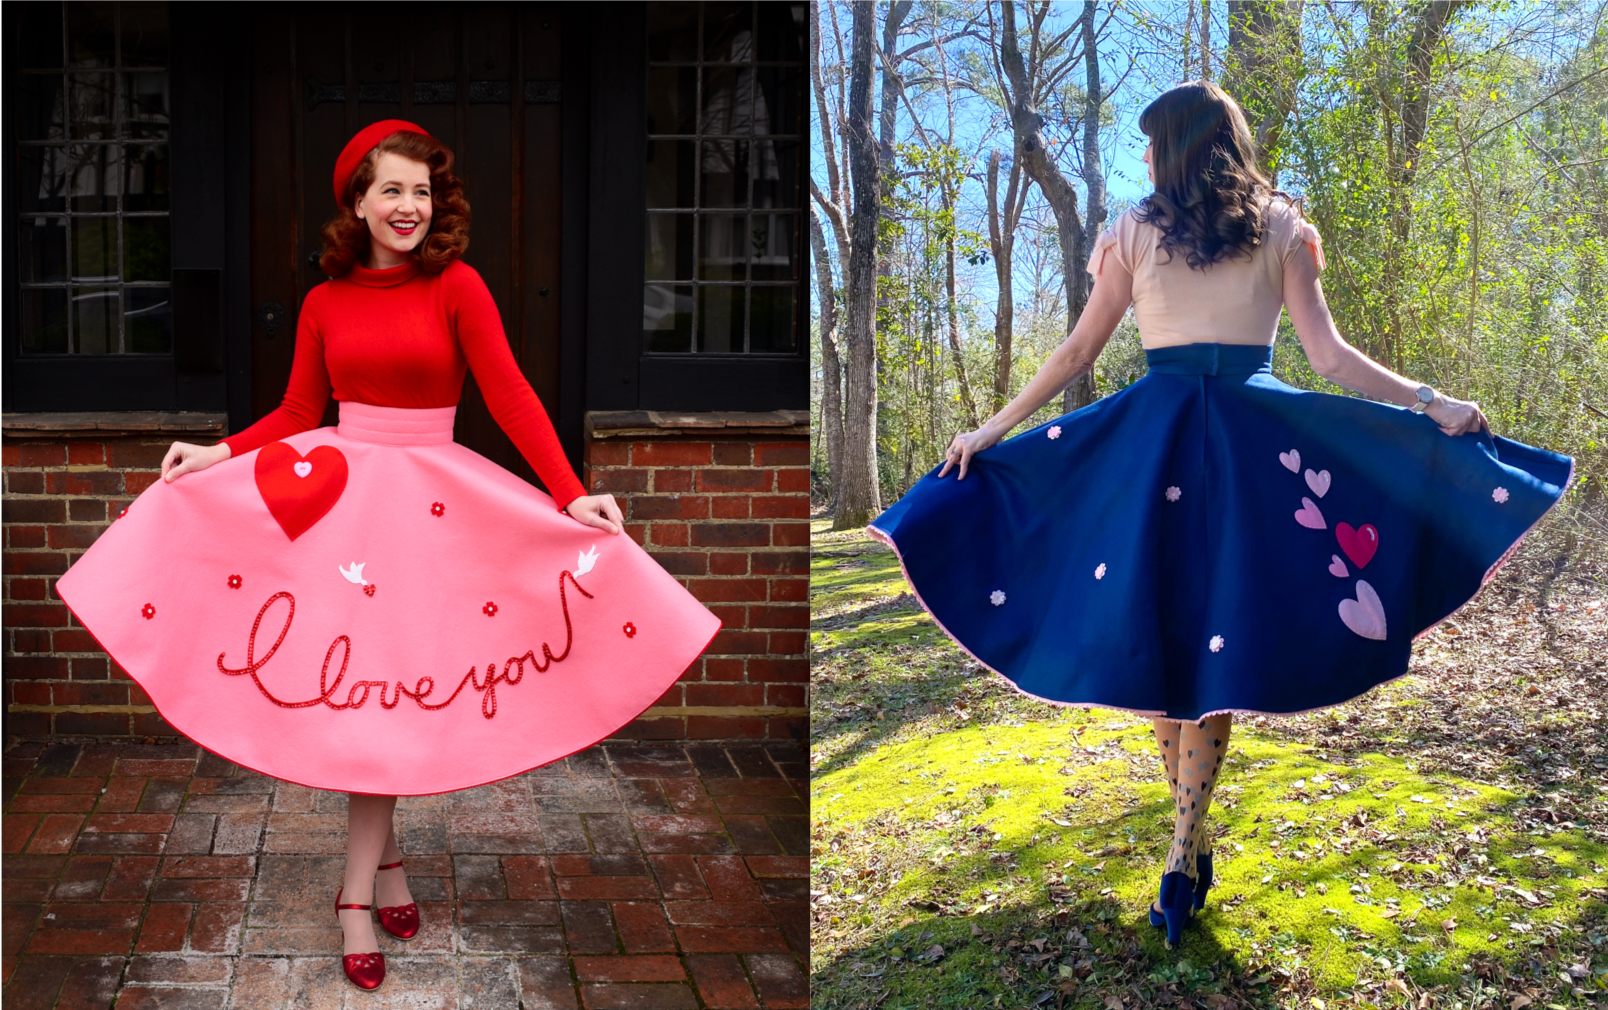
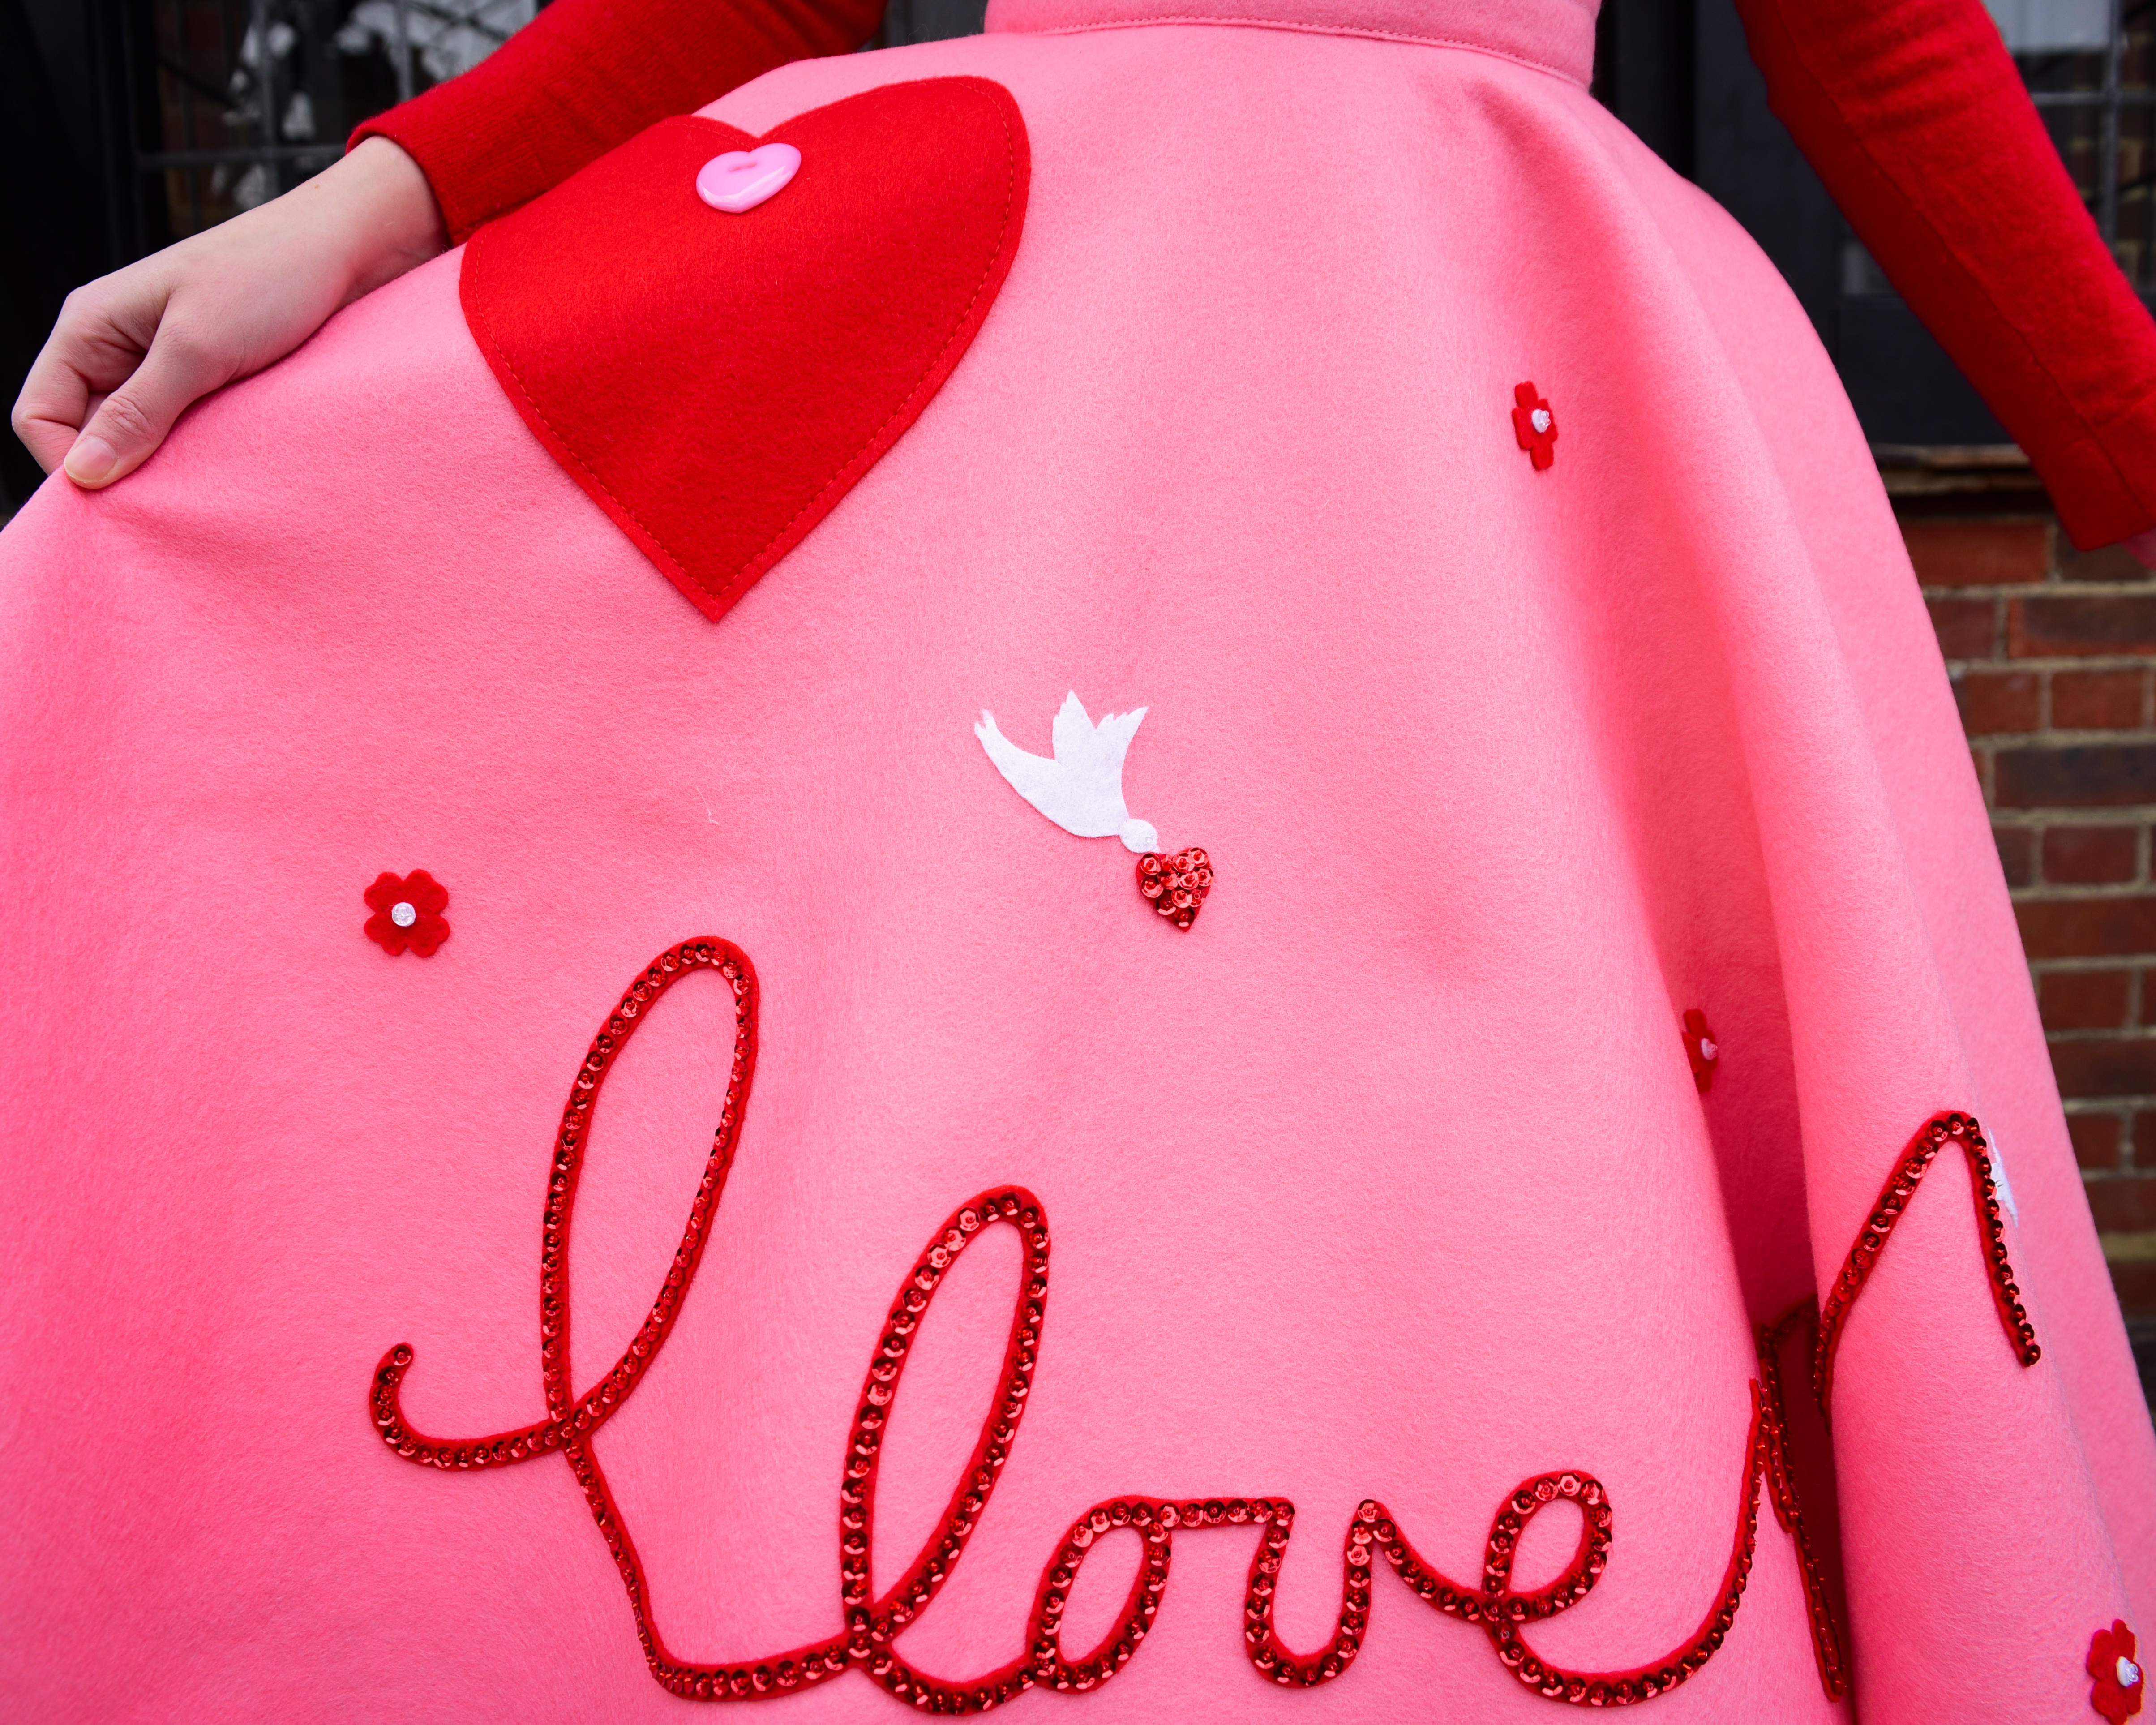
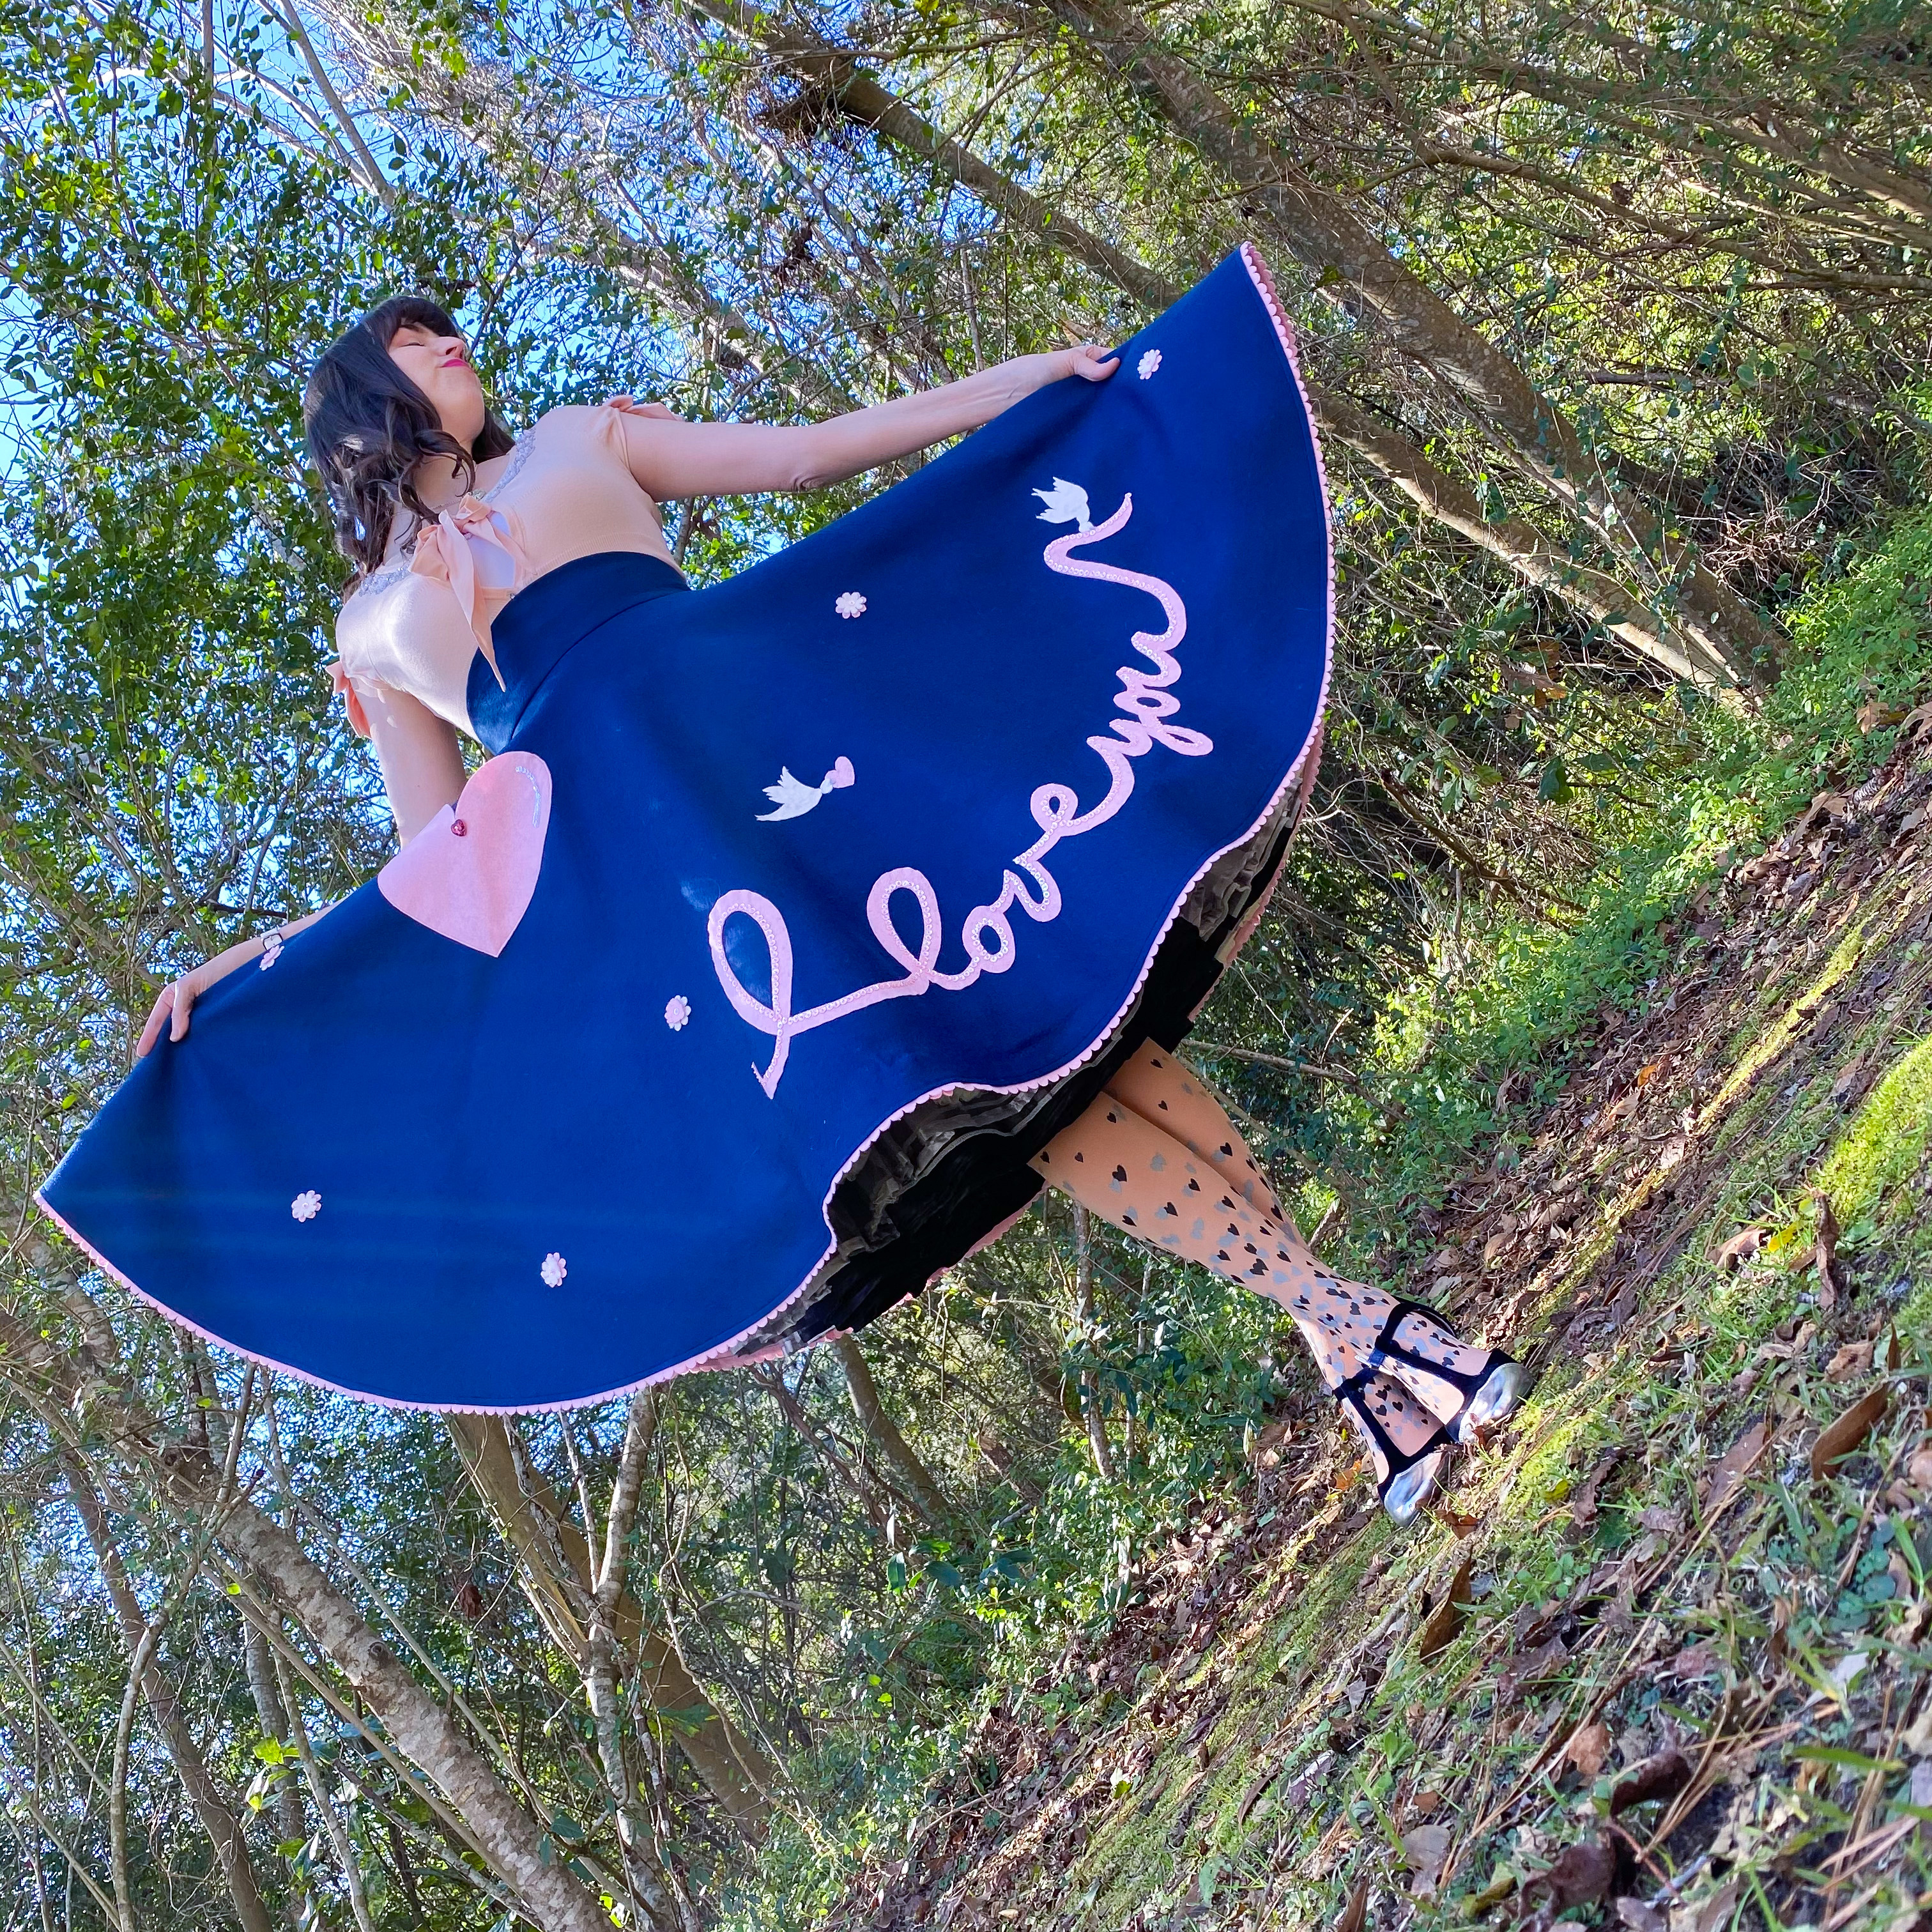
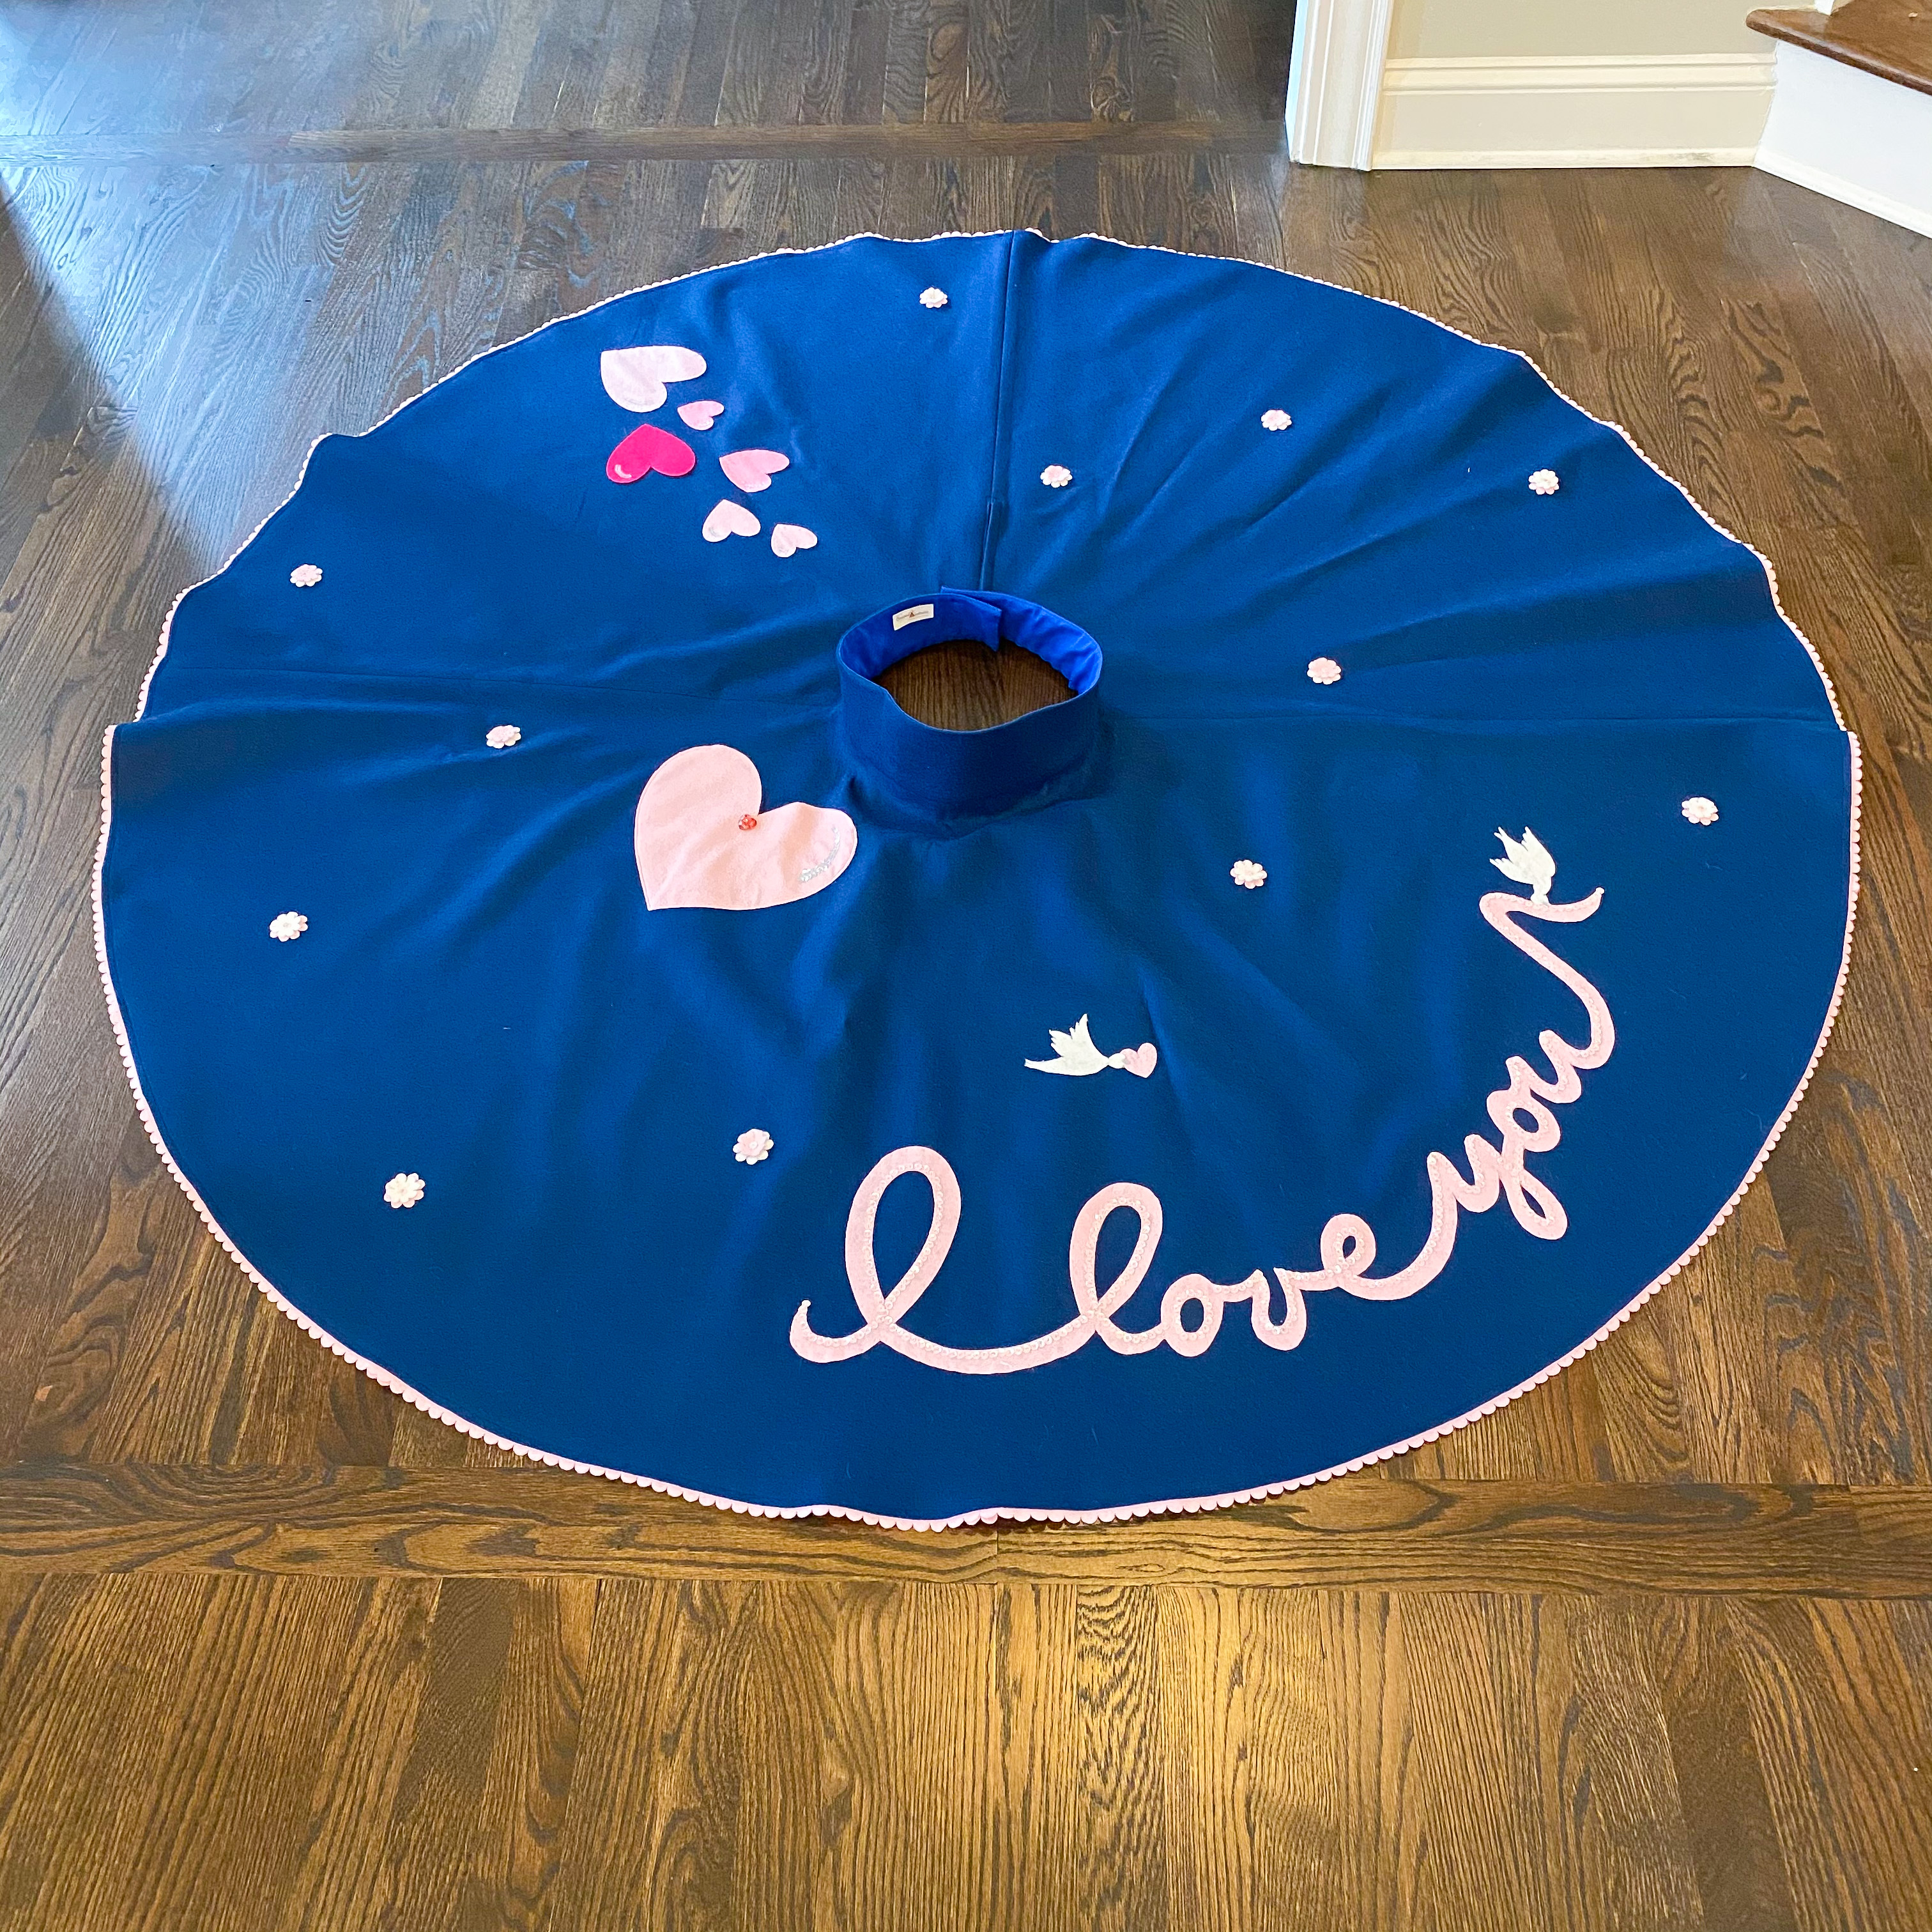
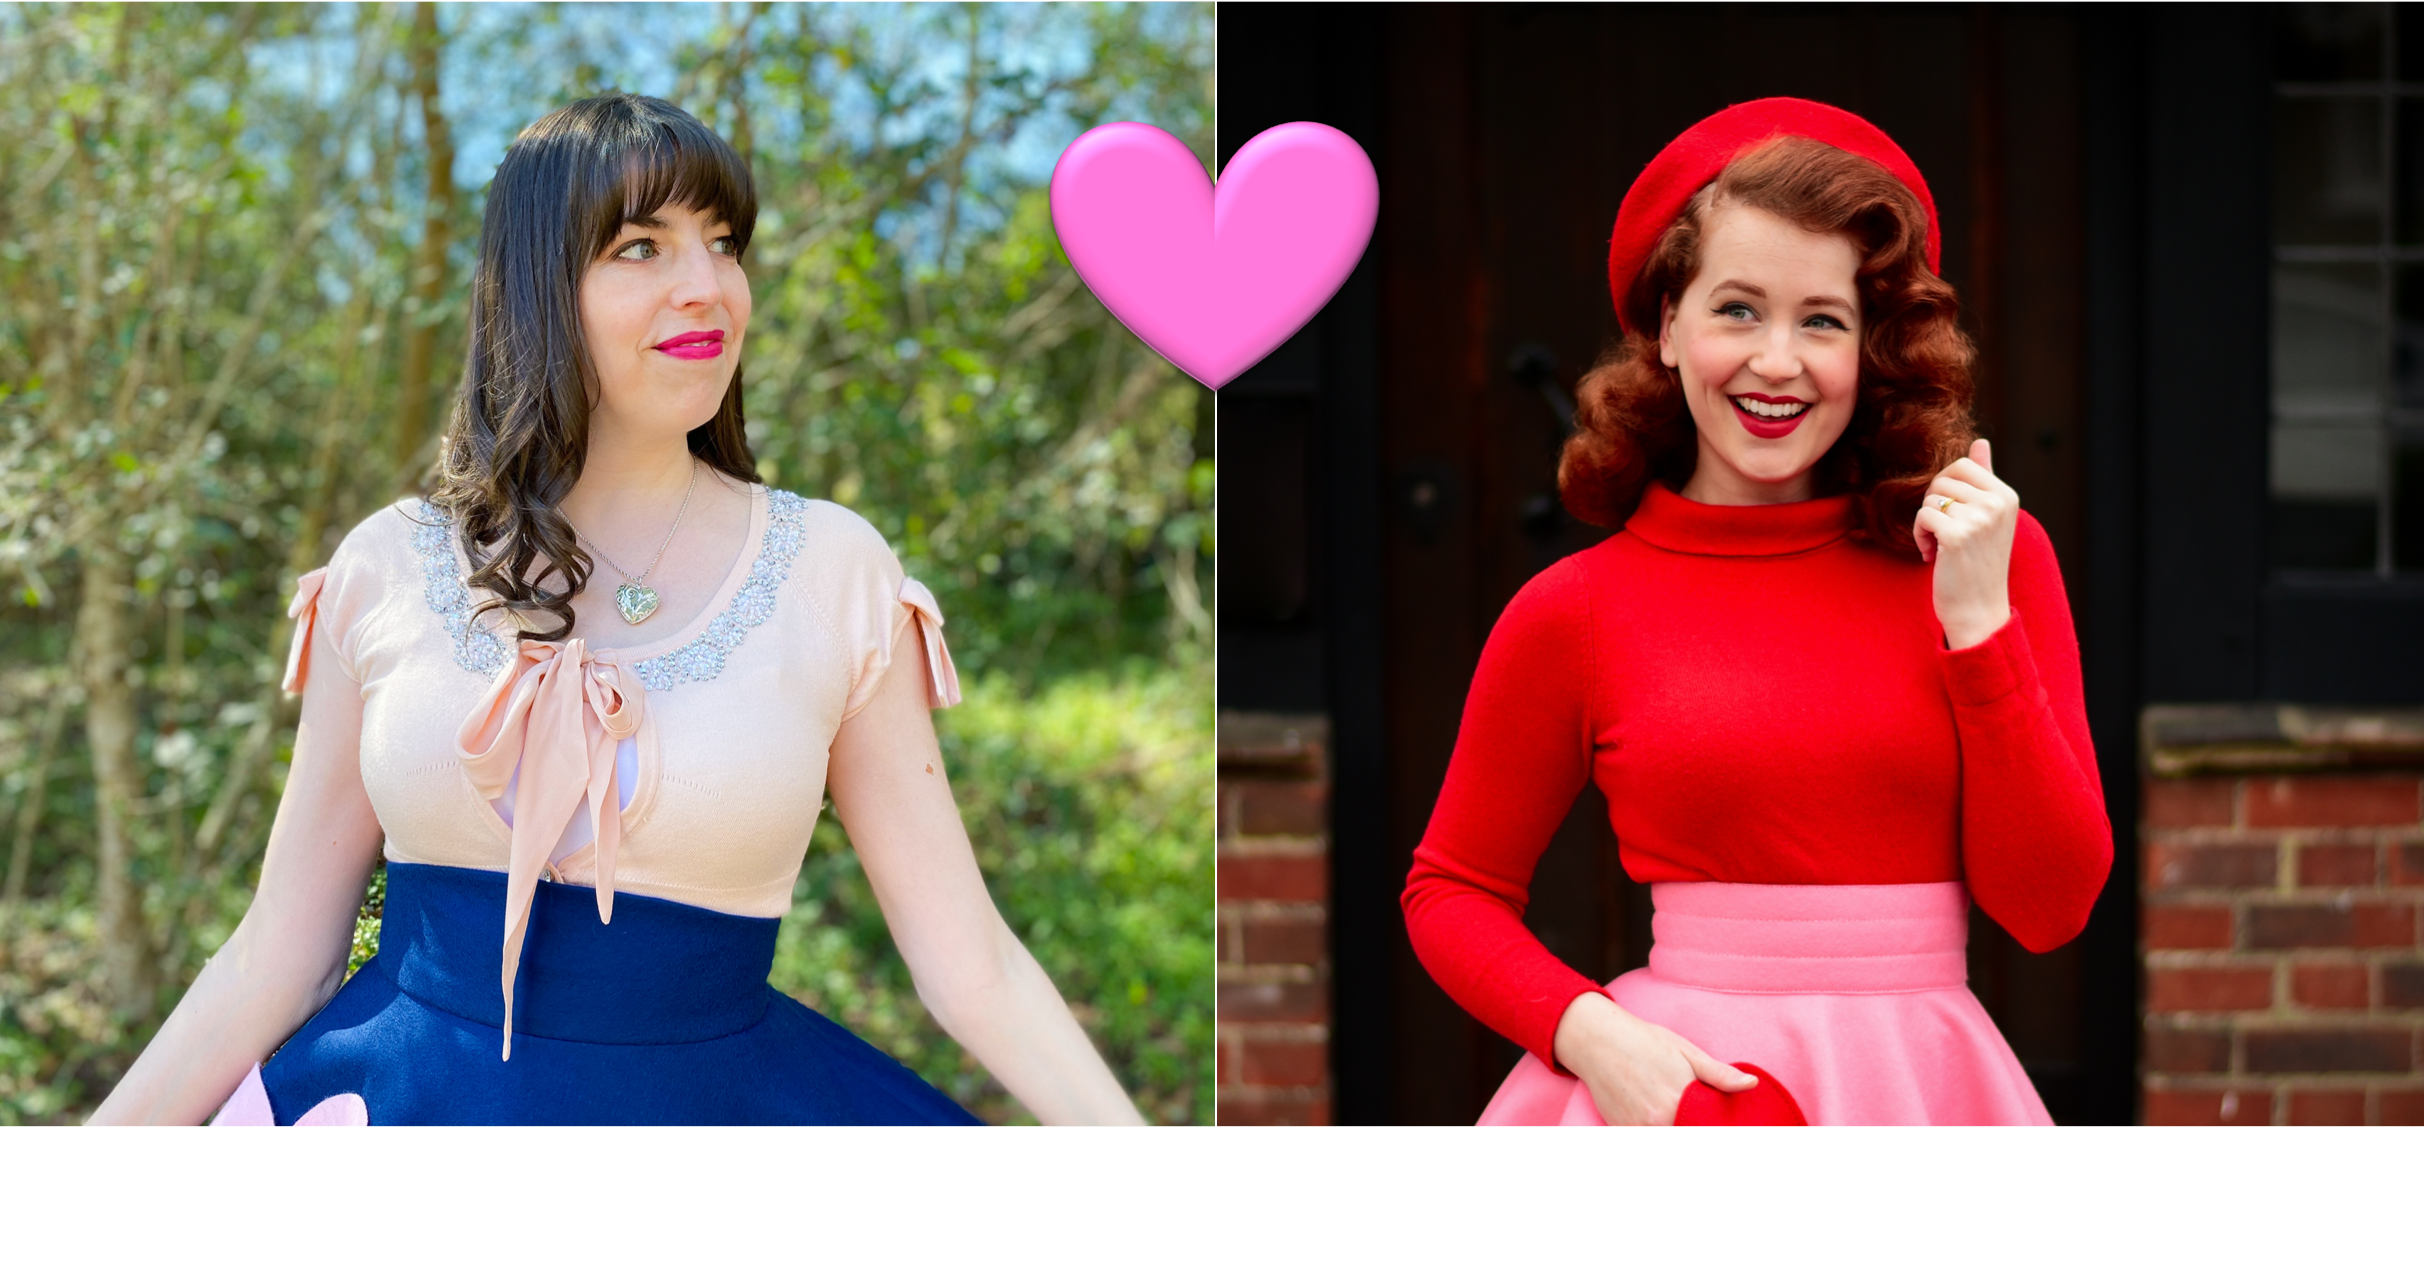
In mid January, a few weeks before the big day, it was time to start. We got our materials ready; Kara opted for a gorgeous pale pink on navy combo, while I stuck with the pattern colours of pink and red. I ordered 2 metres of 5025 Pink and a half metre of 5007 Bright Red felt in 100% wool from Wool & Felt. This and the Wool Felt Company are my go-to stores for felt, as they both do 100% wool in super wide widths, enough to cut one big circle for a skirt base. They also both have a huge range of colours, and will send out sample packs so you can get just the right colour first time. I also needed a 10″ pink zip and a metre of pink 75mm grosgrain ribbon which I ordered from eBay, and I already had the white felt, red sequins, and red and clear glass seed beads I’d also need leftover from previous projects. I started by cutting out the skirt base and waistband, then sewed the waistband onto the skirt (with the ribbon behind it). I like to have multiple rows of stitching on my waistbands, similar to skirts by the great Juli Lynne Charlot, and measure out my lines to stitch using a ruler and tailor’s chalk. Once I added the zip, the skirt base was done!


I then cut out the pattern pieces I needed (the two doves, small heart, heart pocket, one flower, and the writing); they were actually meant to be used as transfers, so I had to draw around the “I Love You” text before cutting it out to give it some depth. I used the pattern pieces to cut out the felt I needed. To save time I only cut the one flower pattern piece and I just reused the same one to make a number of flowers.


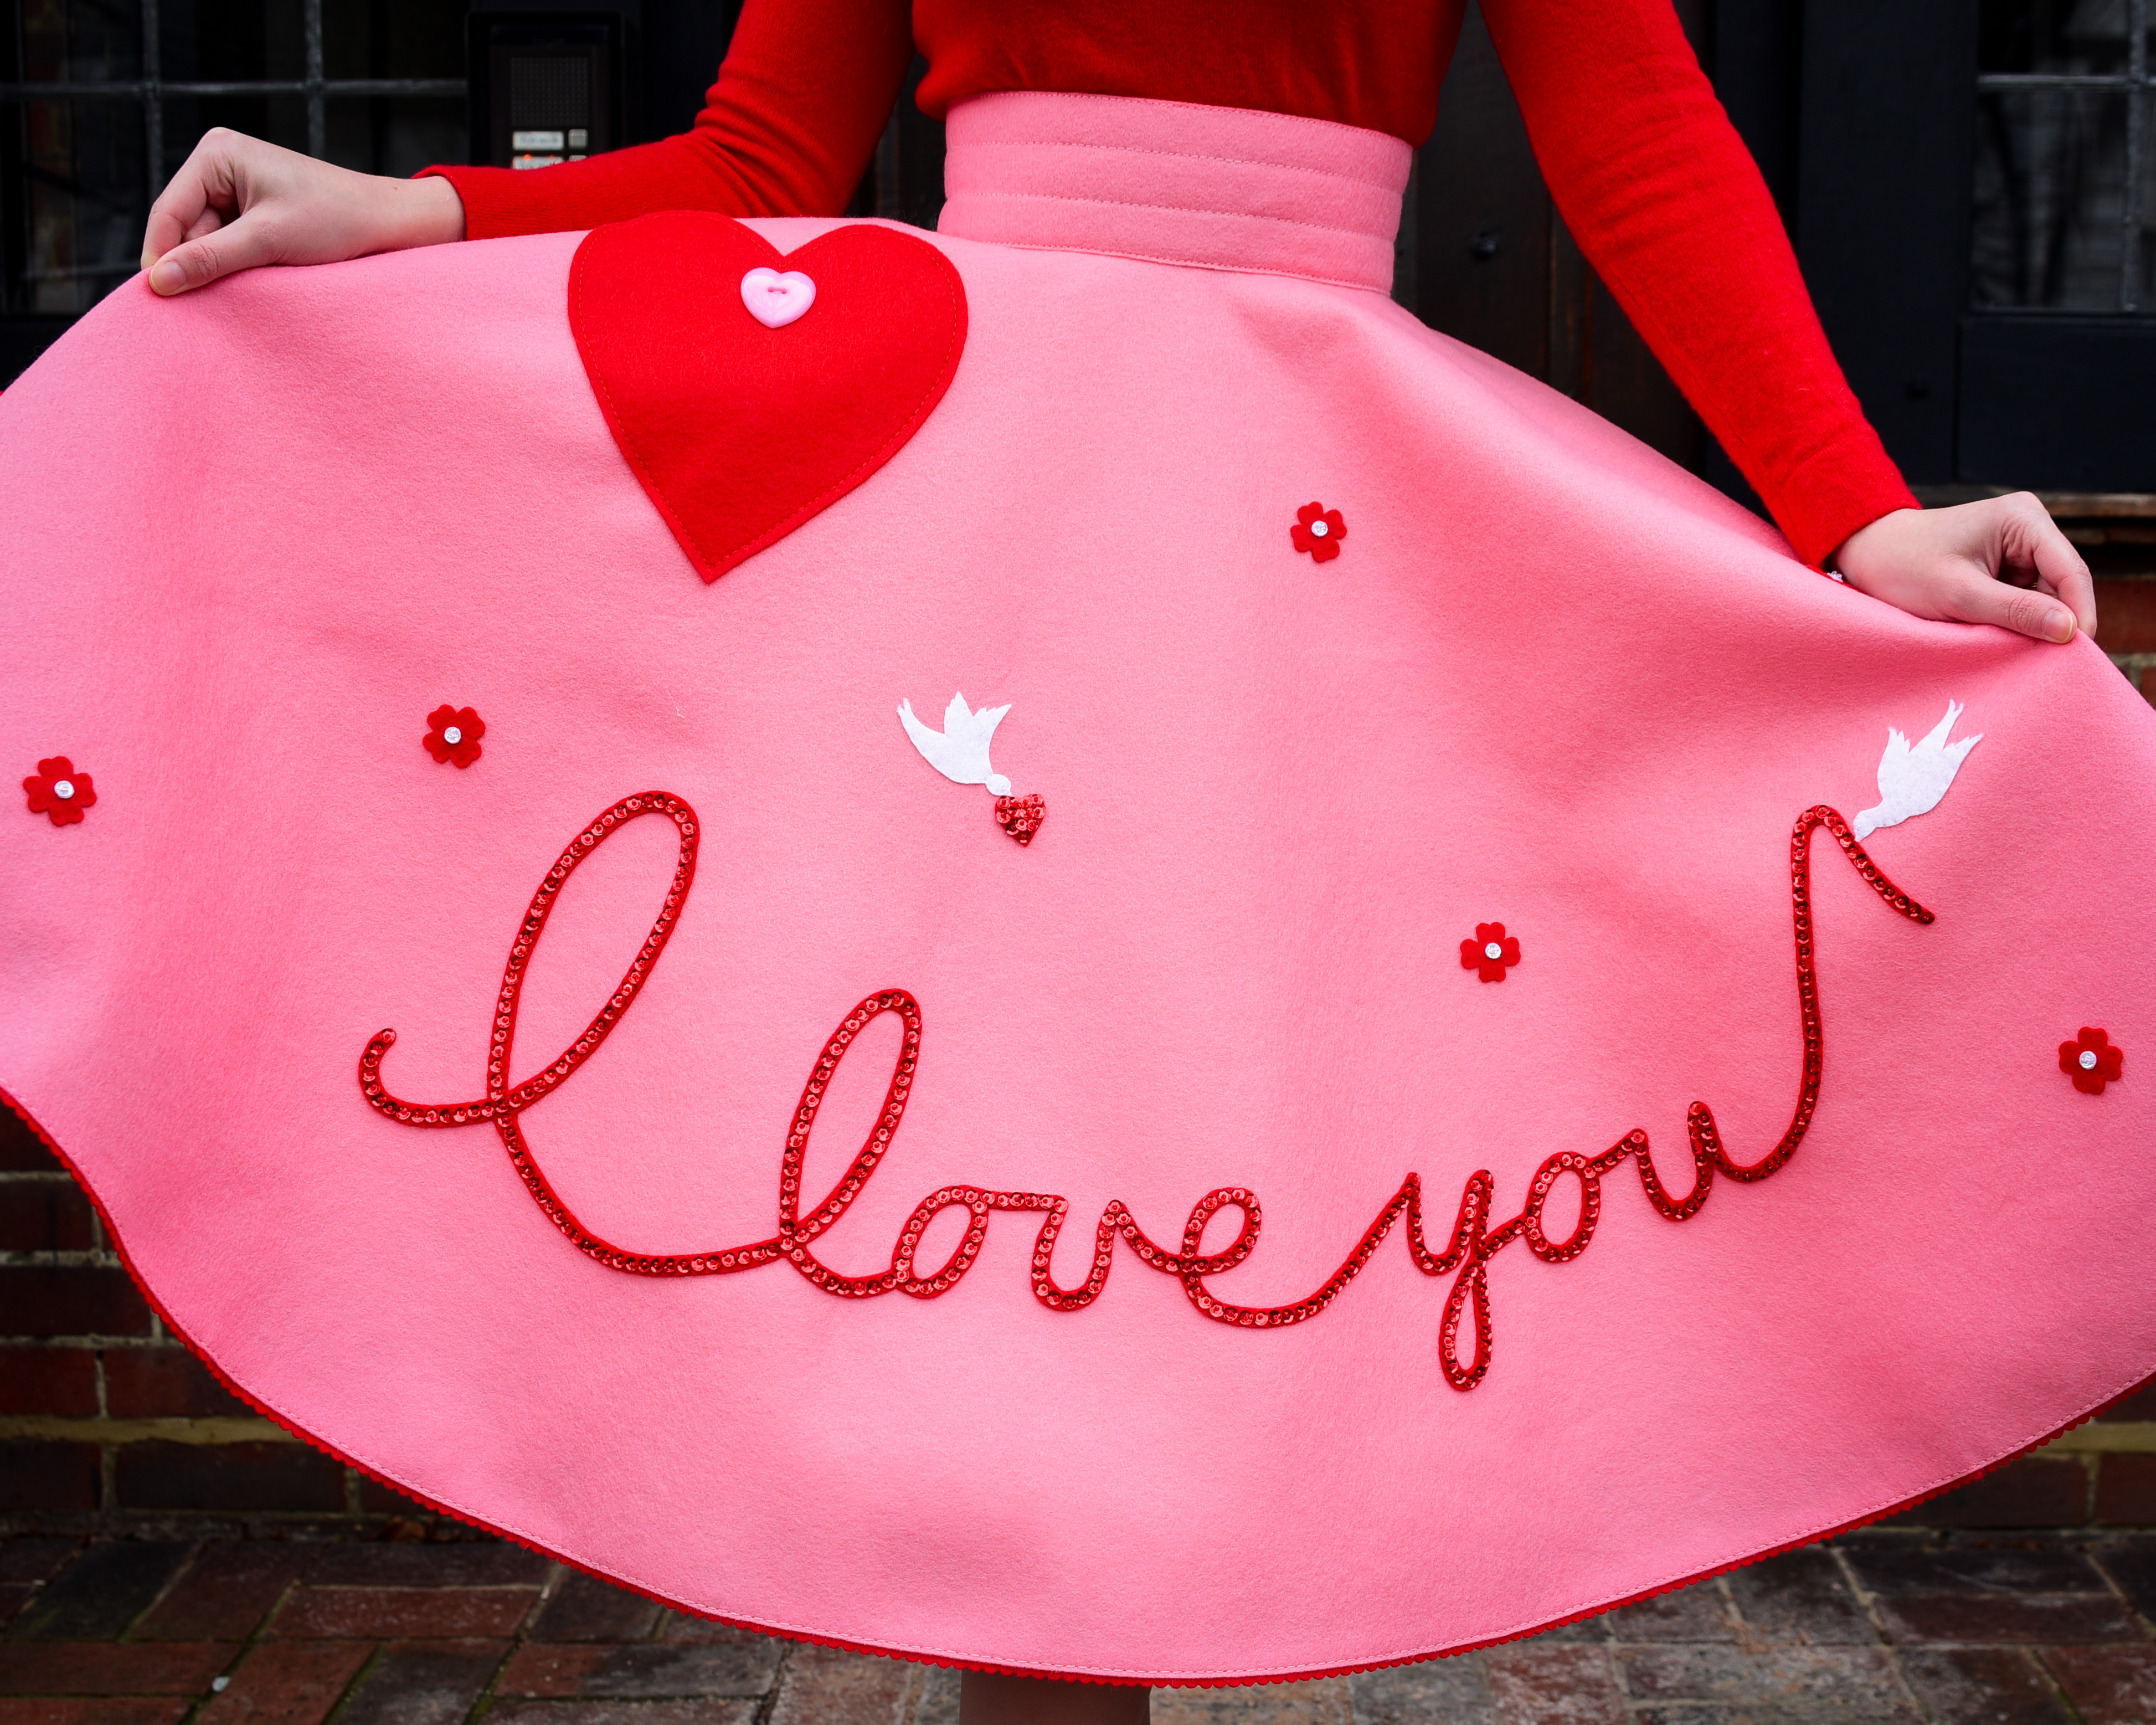
One of the most exciting parts of this make was doing a heart pocket! For some reason I’d never thought to add a pocket to my appliqué skirts before, and what’s more adorable than a heart one?! I cut and sewed this according to the pattern, where you stitched the top of the heart from around the fullest part of one side to the other, and then attached it to the skirt by continuing the stitching the rest of the way around. The placement needed to look like it was sitting in line with the top of the skirt when folded in half lying flat, so then when it was hanging it was at just the right pocket angle.


Next it was onto the sequins and appliqué! I sewed dozens of bright red 6mm cupped sequins and 2mm red glass seed beads all over the “I Love You” – hubby said it looked very camp, so I figured I must be on the right track! This got placed slightly off centre, a few inches up from the hemline of the skirt. I made centres for the flowers with a sequin + 3 bead combo, and covered the heart held by the dove in sequins too. I also used a clear bead for each dove to give them eyes, though of course you can only see this up close! When sewing the appliqué I used a number of tiny stitches, showing as little thread on the felt as possible. Finally it was onto the trim; I compared scalloped and straight trim, but ultimately plumped for the former. For this I used my leftover red felt, cutting strips just over a centimetre wide with my 7mm scalloping scissors, and sewing onto the hemline with a back stitch. The final touch was adding a giant heart button to the outside of the pocket, with a snap inside (Kara’s brilliant idea!). This way I could have the effect of the button seeming to hold the pocket closed, but without having to deal with a button hole. Works for me!


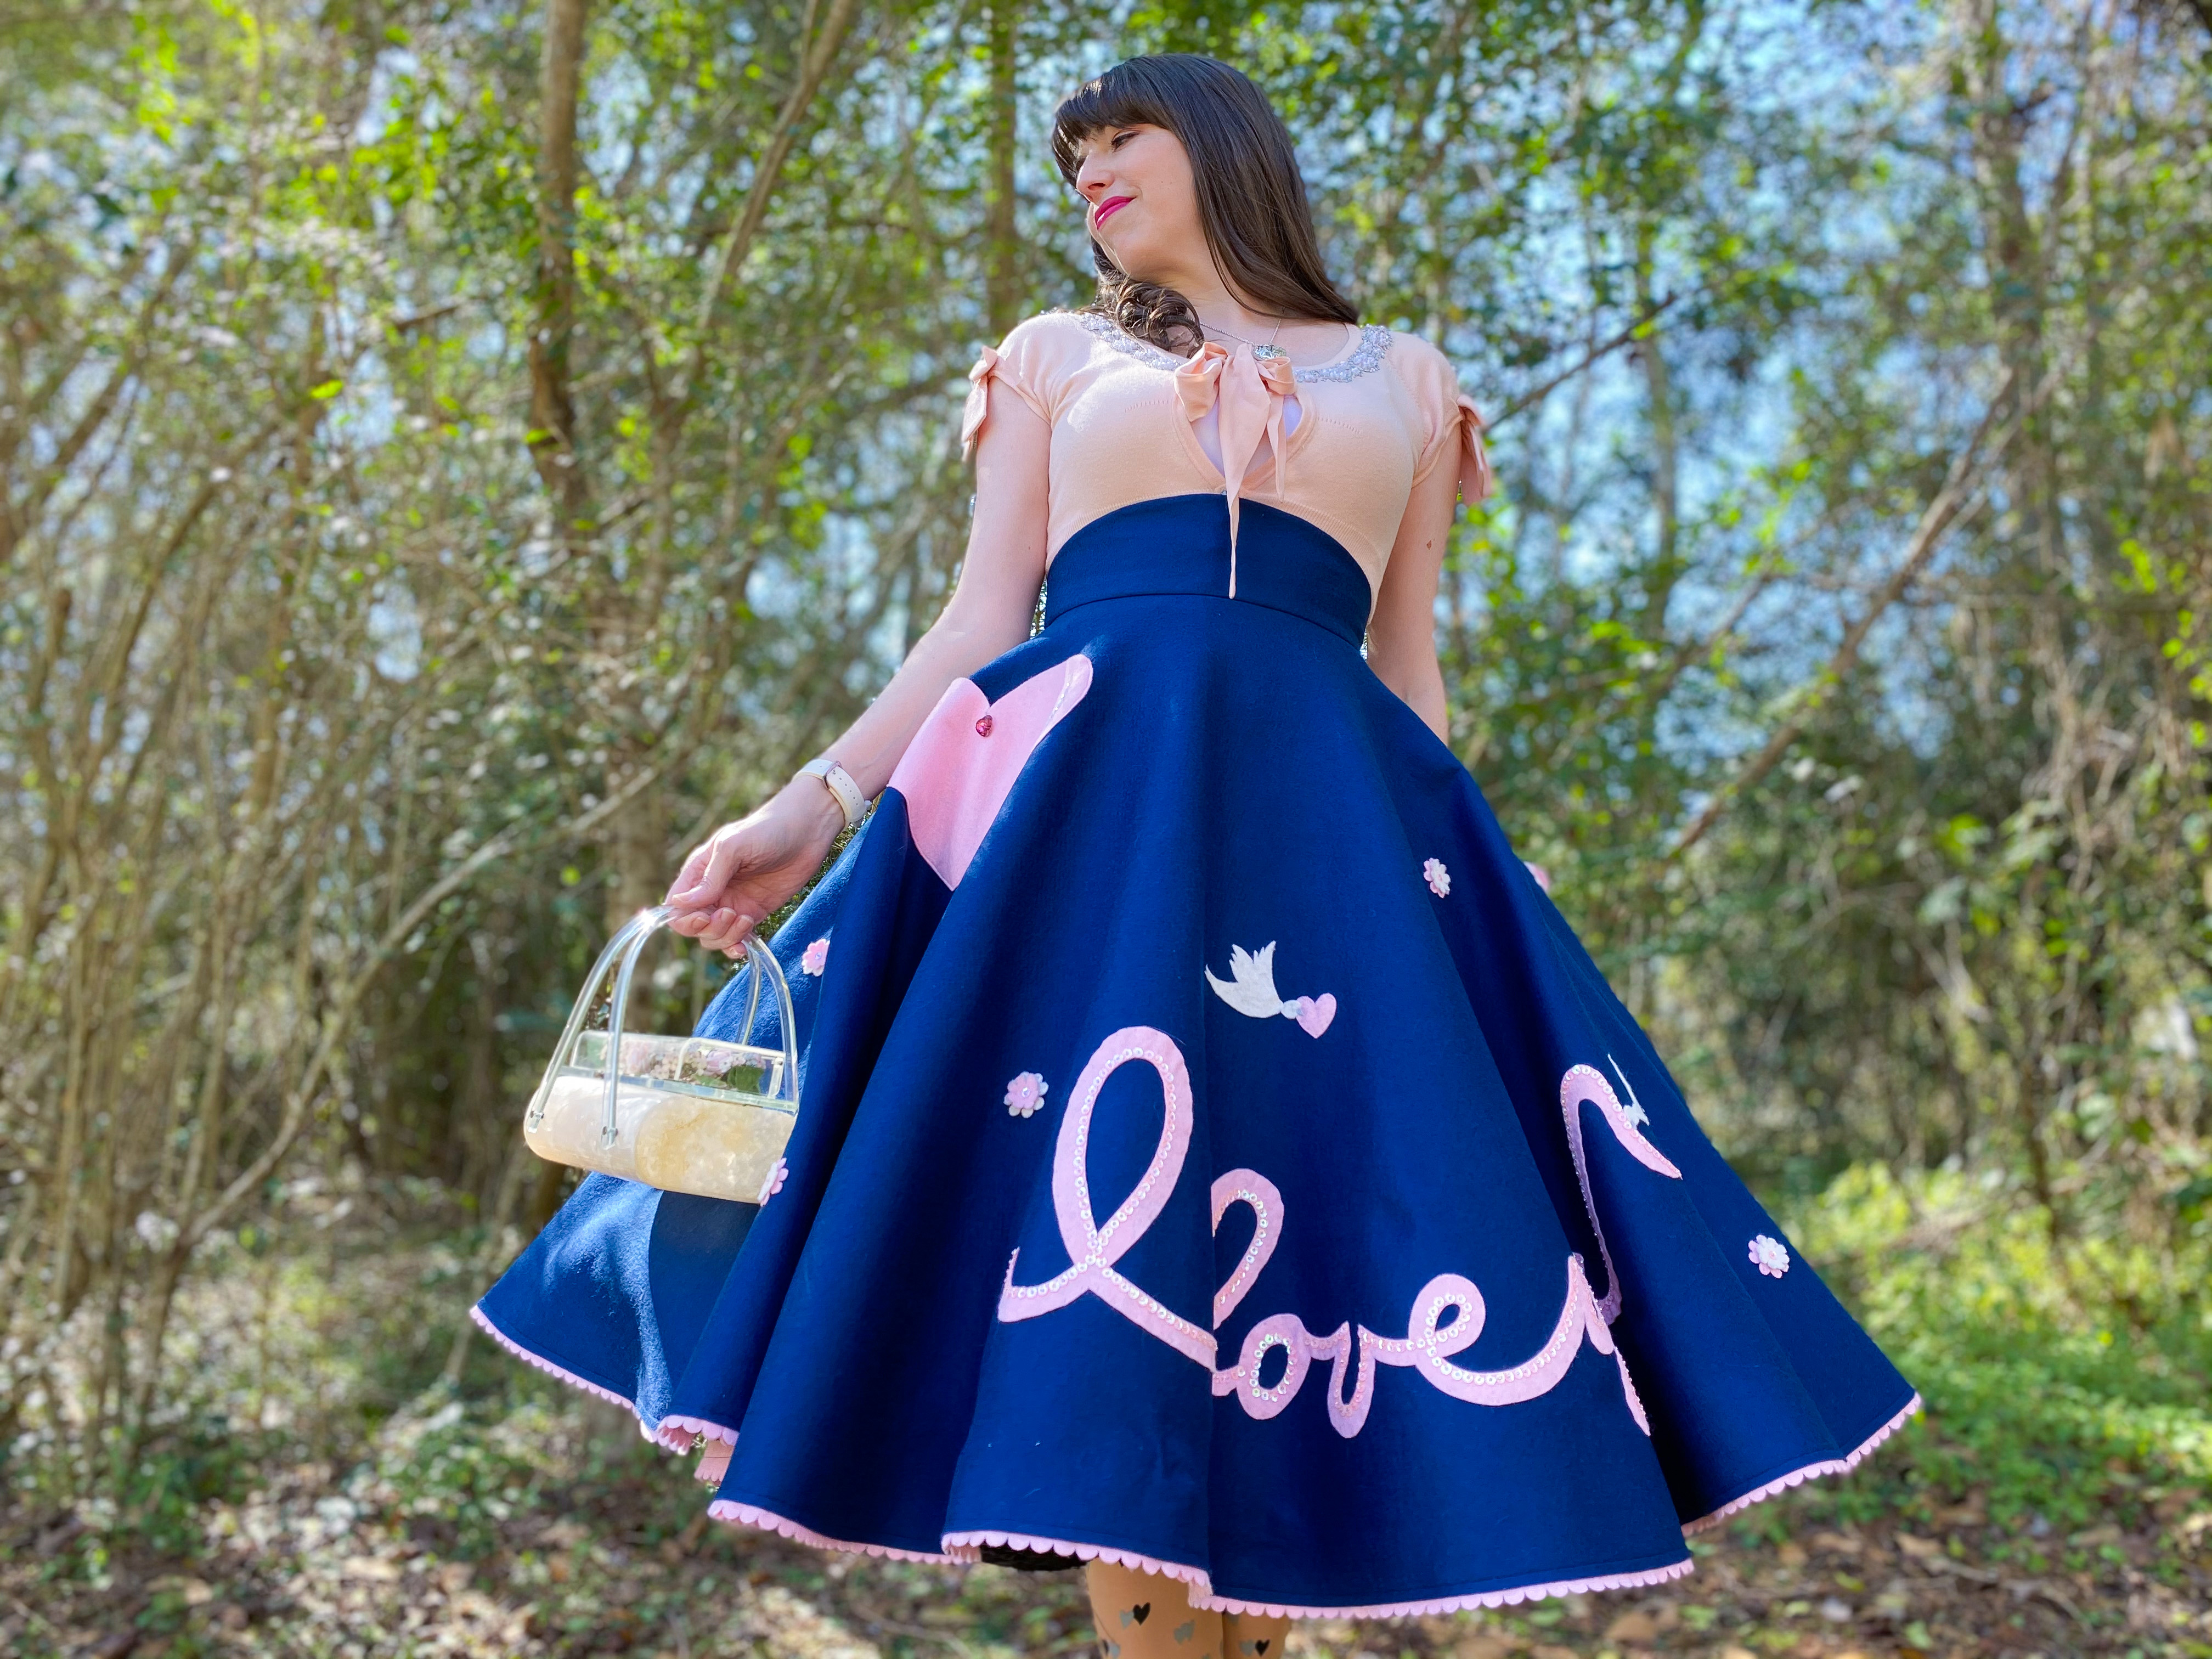
And here’s the finished project!
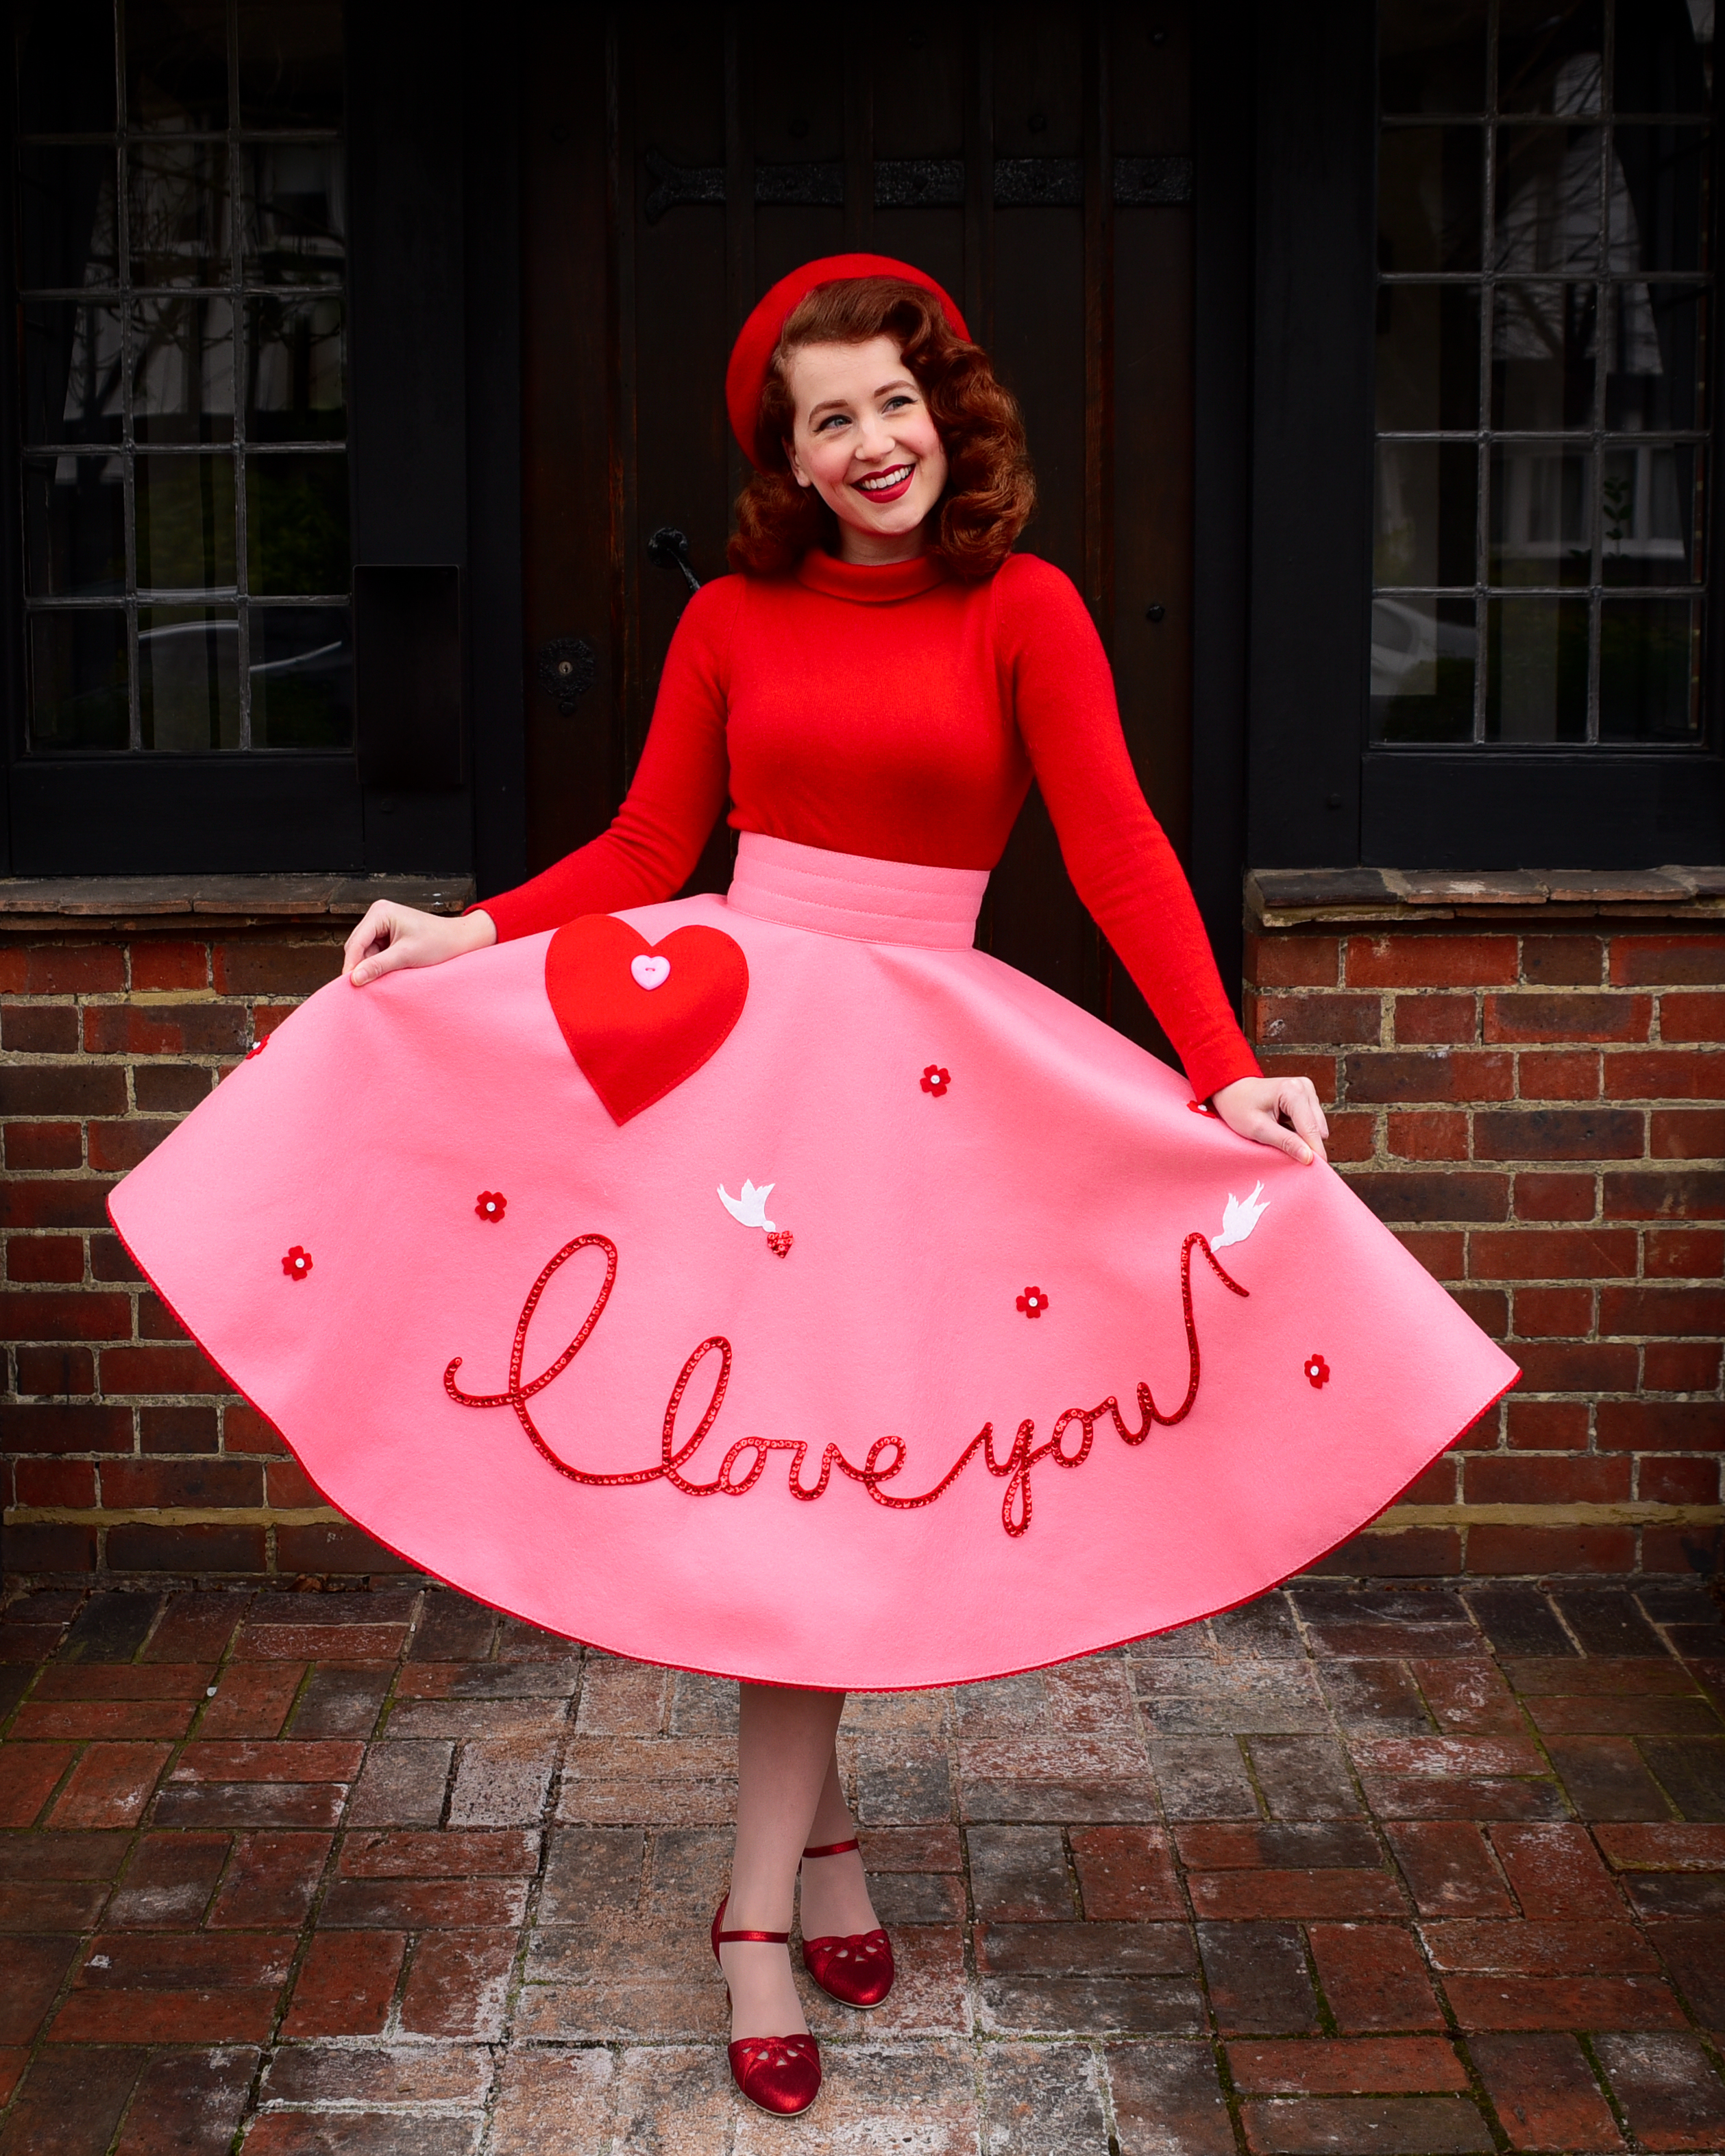

Full outfit details:
Skirt – made by me
Jumper – Hobbs
Heels – Charlie Stone Shoes
Beret – Amazon
Check out Kara’s amazing finished skirt too! You can see her detailed make process here.
A big thank you to the lovely Kara for the idea of a joint project, and for always cheering me on! She’s the absolute best to bounce ideas off and nerd out about all things appliqué and vintage. Check out Kara’s blog here and her Instagram here. And thank you to my love @cmjsnz for snapping these outfit pics on Valentine’s morning! I promise I made him breakfast afterwards. Another transatlantic sewing project may be in the works, so stay tuned…
Miss Hero Holliday
xo

Absolutely the cutest skirts! Beautiful details. You both look adorable and stunning at the same time.
LikeLike